Fuji X100 X100S X100T Charger BC65N Charger DIES!

fuji-bc65n

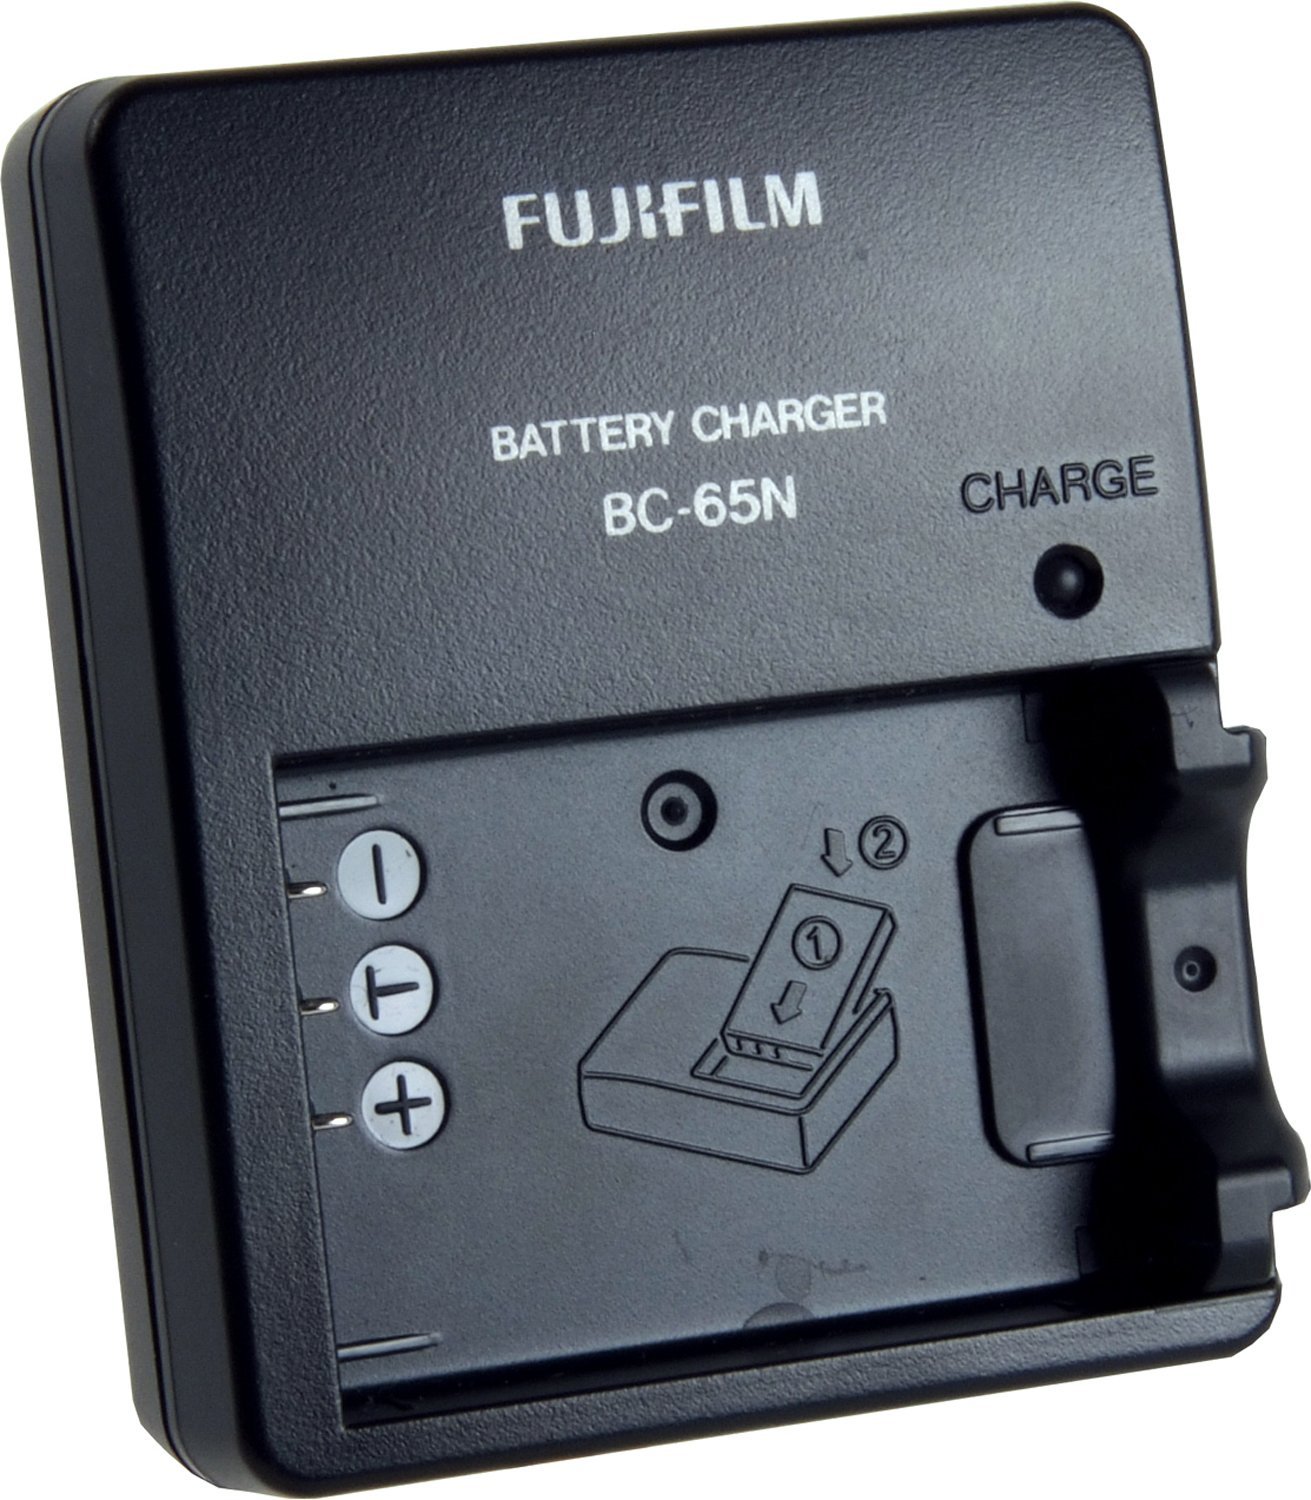
In case you're wondering if your charger died or your batteries/camera is malfunctioning, here's what to look for. The X100 Fuji Chargers are prone to failure and has been reported to have statistically the worst failure rate within the industry.

These are some tell tail signs:

1. Your battery seems to die prematurely. Either it doesn't last the time it's meant to or it doesn't shoot the amount of shots it's rated for. Typically, a standard Fuji NP-95 battery with 1700 mAH lasts around 3+ hours or 250-350 shots depending whether you're shooting JPG or RAW and whether or not you have power saving functions turned on.

2. When you place your battery in to the charger while the charger is unplugged, the green light on the charger lights on. This is one of the immediate signs of a bad charger. A good charger will never show any lights when unplugged.

3. After the battery's been sitting in the charger for 6-7 hours or you've just placed a battery in to the charger and the green light on the charger blinks constantly. This is an indication of a bad battery. However, if this light comes on after a full charge cycle it is likely the charger itself has malfunctioned as well. Try the above mentioned No.2 step.

Luckily we have lot's of inexpensive solutions. A replacement OEM Fuji charger comes at around $40 and is recommended for the OEM Fuji batteries due to the fact that these OEM batteries have a 3 pin design. A Positive, Negative and a temperature reading pin. The 3rd pin is used by the charger to determine the batteries temperature/charge/life and to ensure it does not over charge. The OEM Fuji batteries are also quite expensive compared to aftermarket batteries that go for $10 a piece. An aftermarket charger also goes for $10-$20 and works just fine. You can find those from Amazon.com and Ebay.com sellers. However, keep in mind those cheaper batteries and chargers my seem identical by appearance it may not be the case. For example, the 3rd pin on the battery maybe purely aesthetic and the chargers may not have a 3rd pin for reading the batteries temperature. In other words, I wouldn't recommend charging OEM quality batteries with cheap chargers. However, with the economical price of those aftermarket batteries and chargers you can get more than a few of them to suit your needs for the price of 1 Fuji Charger / Battery. I've personally used batteries from MaxiPower and their batteries rated at 1800 mAH does last just as long as the Fuji NP-95 batteries.

Championship Amateur Boxing: Fight Night at Italian Cultural Centre (Vancouver, BC) | Confratellanza Italo-Canadese & NBBC

Fight Night at the lovely Italian Cultural Center for this years Amateur Championship Boxing for Vancouver clubs such as Burnaby Boxing Club and Pack of Wild Dogs from Richmond. I was invited to be the official photographer for "Pack of Wild Dogs" (PoWD) Club featuring our Champion of the night Ali El Kurdi.

The Fight

And the moment everybody's waiting for. Off with the head gear and the shirts! The crowd cheers as the announcer introduces both fighters from Richmond and Burnaby for the Championship fight! Ali El Kurdi VS Jamieson Louis! Ali explodes in to the first round furious with rage. That's his style! His opponent struggles to parry off Ali's raging bull offense and slips on to one knee in the second round and the third. Second round, the fight was quick paced and even, blows exchanged as both fighters circles the ring for offensive stance! Ali fired many hay makers and landed a few while receiving his share as well! By the third round Ali changed his pace and they were exchanging blows left and right. No knock outs. But Ali emerges as the Champion of the night by unanimous decision from the judges. Both fighters put up a great fight!

Gear and Comments:

Nikon D7000 | 70-300mm VR F4.5-5.6  FX | Nikkor 50mm F1.8 D

Nikon 70-300mm F4.5-5.6 VR FX
I wanted to see how the 70-300 performed with action photography under low light conditions. The stage of was just lit enough for the 70-300 to work at from f4.5-f5.6 while pushing my auto iso limits from 1000-1600. I don't like noisy pictures so I try to limit the iso although the D7000 can produce useable pictures past iso 3200. The shutter speed was a reserved 200-300 because I wanted some motion blur, although next time I'd bump up the shutter speed just a tad to get some nice clean freeze action shots. The stage was raised of course so I stood at the back wall behind all the audiences on a chair to get some height. From such a hyper focal distance I used a single servo mode. Overall I was impressed with the performance of the 70-300mm. It is a very capable lens for this type of photography given there is enough light. The focus is fast and in day light the performance of this lens only gets better.

Nikkor 50mm F1.8 D
I also shot with a 1/200 sec shutter. Honestly, I could have bumped up the shutter speed here since I was shooting at f2.8 and the auto-iso fell between 200-360. I was so caught up trying to catch the action I forgot to adjust the shutter. Amateur fights happen REAL fast and get heated real quickly!!! This time I was up against the ropes right below the ring. The fighters moved around quite a bit so it's hard to get nice clean shots showing both of them since a lot of the times you're going to see someones back which means nothing really going on in the shots. None the less, the Nikkor 50mm is a fast inexpensive prime lens and it performs just fine for such action photography. Again I relied on Single Servo mode as I'm confident in the D7000's AF abilities to catch the shots I want. Here's the part where having some boxing experience helps as a photographer for such action photographer, you'd want to anticipate when the shots are going to come.

After thoughts

If I were to do this event again, I'd use a 24-70 f2.8 or a 70-200 f2.8. The 24-70mm would be fantastic up at the ropes. It is a mid range fast zoom perfect for such conditions. The 70-200 would be great with a tele converter or somewhere up higher than the stage to avoid the ropes getting in to the frame. I didn't have either of these expensive lenses at the time (24-70 broke) so I made out with what I had. Also, I would opt to use Continuous Focus mode with a Hi Speed Multi Shots and 3D AF.


Joby Ultra Fit Sling Strap Review & Impressions

There's a few strap systems out there for cameras but I'm going to highlight and review the Joby Ultra Fit Sling Strap and why I'm personally using it now. The stock straps that come with our cameras are fixed length and designed for hanging on our necks. If you have a heavy camera and lens it can cause fatigue. Even if you hang it on one shoulder the camera is not ergonomically accessible.  

This sling strap solves a few key problems while bringing features other straps don't have.

1. Reduced neck fatigue! Shoulder Mount style Soft-edged High-Performance Webbing for a Perfect Fit that contours your body. This fitment is snug and comfortable on your shoulder, it's not so wide that it becomes cumbersome yet it's slim and sleek enough to handle the weight of a Nikon DSLR with a battery grip (6AA's), a flash with diffuser and a long heavy lens mounted. This system is designed ergonomically for quick access.


2. A Pivot Ring for quick adjustment fit is the deal breaker for me as it gives the ability to adjust the length of the strap quickly with a single action. This allows me to carry and switch between cameras quickly and allowing you to temporarily store your camera by your side worry free. This is a good feature for traveling, hiking, street photography where you move around a lot taking pictures periodically.


3. A locking mechanism which keeps the camera tight to the body preventing it from swinging around. You can adjust the the strap to have the camera behind you or in front of you depending on the size of your camera and your preference. This keeps the camera safe and close by your side. Other straps have it dangling around, it may bang on your knees or on your hip.

4. The mounting hardware and seal is also crucial in my decision to go with this strap.
The mounting point has rubber cushioning for a snug seal to ensure it never gets loose. It has never come loose in my experience and has served my well during busy events where I'm constantly switching between the cameras I'm wearing.

Conclusion:
The packaging is sufficient and the branding is pleasant, it comes with a small instruction booklet. It takes seconds to mount it to the camera. Don't bother with the no name brand straps off of eBay, the construction and quality simply isn't there. The material may rip or fall apart. You wouldn't want to risk an expensive camera with a cheap strap. This however is not a cheaply made strap. Out of all the brand name sling straps, it has one of the lower retail price tags while the strap is made of quality material. They got the price point right! You won't be disappointed whether you're using this strap for a DSLR or compact camera system.

PROS:

-Comfortable.

-Carries good weight (professional DSLR cameras no problem).

-Good Value. (As low as $25)

-Locking Mechanism and quick adjust-ability.

-Solid Hardware and quality material.

CONS:


-Tripod mount becomes occupied, must remove strap before mounting on tripod. Although this isn't really a CON, some people may want to have the pod slot open for mounting or keeping a bracket on. It takes just seconds to remove the strap from the camera body though.